
I have been using GitHub pages for my personal website for a while. The GitHub Pages provides a free Jekyll-based static web hosting solution, and hence its popularity. However, I recently decided to build a self-managed version of this setup for the following reasons:
- I want the control of the every layer of the web and network stack from the OS to the web application.
- I want to incorporate some DevOps concept and tools especially Continuous Integration (CI)
And I am not the only person doing this.
Below is what I want to achieve at the end of this project.
- To be able to serve static web pages (obviously)
- To minimize the repetitive work including the build and deploy process
- To have at least an
Aon Qualysis SSL Lab test regarding of web security - To have a decent score on Google Page test regarding of web performance
- To host everything on a single
t2.microAWS EC2 instance yet with the possibility to scale
Ok, too much talking. Let me show you how I did it.
Overview
I drew up the diagram below to show you the possible deployment options one can utilize to publish the webpages. For the purpose of this post, I will focus on the Deployment Option (A) via Global Edge, as it gives most control and is sort of a superset of all the other options. Like any other systems, the more control usually leads to more complexity to be managed. It is about the balance, they said.

Steps
This section outlines how I implement the above-mentioned setup. There are loads of documentation well written on each of the components. So I will avoid reinventing the wheels and instead give you the references along the way.
1. Set up a GitHub repository for Jekyll
This step creates a GitHub repo to store your code for Jekyll for the other components can get the latest code base for your website.
Prerequisites:
- A Github account (free or paid)
Notes:
- If you wish to take the Deployment Option (D) via GitHub Pages in my setup, you can following the guide on GitHub Pages and ignore the following steps.
- Both public and private repository will work. Choose public repo if you are not ready to pay.
Guides & References:
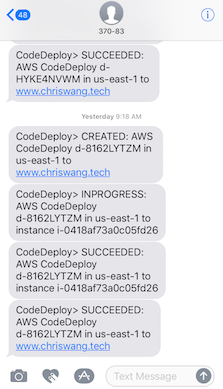
2. Set up Travis-CI for automated build and deployment
The Travis-CI helps to build and test the static website from the GitHub repository upon every push. It can also automatically deploy your website to your preferred hosting platform, in this case, AWS.
Prerequisites:
- A Travis-CI account (free plan for the public repo, paid plan for the private)
Notes:
- Travis-CI does not deploy to EC2 instances directly. That is the reason why AWS and S3 CodeDeploy is introduced in the next step. The high-level flow is like this:
- Travis clone the source code from your GitHub repository in its Linux container environment.
- Travis build the source code and if passed, zip the generate the website in
_siteaccording to.travis.yml - Travis deploy the zip bundle to an S3 bucket and hand over to AWS CodeDeploy
- AWS CodeDeploy deploys the zip bundle in S3 bucket to the EC2 instance(s).
- Do not use Travis-CI’s upload build artifacts tool for deployment.
Guides & References:
- Build: Travis-CI with Jekyll guide
- Deploy: Travis-CI with AWS CodeDeploy guide and an Example .travis.yml
3. Set up AWS CodeDeploy for automated deployment to EC2
As mentioned in the last step, CodeDeploy is the AWS component that ensures the website generated by Travis-CI is deployed to the right AWS components at the right place and permission. Although I think CodeDeploy is overkill for my “pet” single-EC2 setup, it is definitely necessary when you need to deploy code to anything more a couple of “cattle” instances frequently.
Prerequisites:
- An AWS account
- Basic hands-on knowledge of AWS EC2, VPC, IAM
Note:
- Personally I think the IAM configuration is the conceptually challenging part of this step. Pay attention to the following three tasks:
- Creating IAM User: granting the user (i.e. you) access to the CodeDeploy and the AWS services and actions AWS CodeDeploy depends on.
- Creating Service Role: granting permission for the CodeDeploy to access the instances to which you will deploy applications.
- Creating IAM Instance Profile: granting permission for the EC2 instance(s) to access the S3 buckets where the deployment bundle is stored
- The CodeDeploy is configured by the
appspec.yml. The most important directive is the sources and destination file path.
    files:
      - source: /
        destination: <destination_path e.g. /var/www/...>
Guides & References:
4. Set up an AWS S3 bucket to store the deployment bundle
A standard AWS S3 bucket needs to be created to store the deployment bundle built by Travis for deployment to the target EC2 instance(s).
Note
- If you wish to take the Deployment Option (C) via S3 in my setup, you can following the guide on Hosting a Static Website on Amazon S3 and ignore the following steps.
5. Setup the base web server configuration for serving the static web pages
This is the time to put on your Linux sysadmin hat and build up the web server. This step requires completion of the following tasks:
- Configure the AWS EC2, VPC, IAM, and Security Group correctly
- Install, configure, test and optimize the web server, in this case, NGINX
- Install, configure, test and optimize the TLS using Let’s Encrypt CertBot
Each of the tasks above requires the understanding of multiple topics related to web technology. If you do not already know them, set some time aside to read up a bit.
Prerequisites
- Linux EC2 instance(s) with terminal access
- Basic hands-on knowledge of Linux command line, TCP/IP, DNS, HTTP & HTTPS, administration of web servers (e.g. Apache, NGINX)
Note
- As you notice, my current web server setup relies on manual configuration on individual servers, which is obviously not suitable for large-scale, high-traffic production web sites. The profession of DevOps/ Site Reliability Engineering exists to address this. As some tactical improvements, the following tools may be worth your consideration.
- Leveraging on AWS’s EC2 Auto Scaling and Elastic Load Balancing or even better Elastic Beanstalk
- Practicing Infrastructure as Code by using tools like Chef**, **Puppet and Ansible
- Consider using the container services e.g. AWS EC2 Container Service
- The Let’s Encrypt CertBot uses ACME protocol challenges to automatically verify the ownership of the website. It helps to understand how the mechanism work with Let’s Encrypt, especially during troubleshooting.
- If you wish to take the Deployment Option (B) via Origin Servers in my setup, you can ignore the following steps. Just be very sure that your website achieves the performance and security target that you set. As you may have learned by now, good performance and security do not come easily if you are new to this.
- If you wish to save effort on improving web performance and security, just proceed to the next step. Am I sure? Of course, trust me.
Guides and References
- Web Server: The official documentations of your chosen web server.
- SSL/TLS
- Web Performance:
- DevOps best practices: The Twelve-Factor App
6. Use Cloudflare to save time otherwise spent on fixing and improving the web performance and security
Even if you have optimized the website to its best in the previous steps, there are often hard limitations to the performance and security. For example, you cannot beat the speed of light that leads to >150 ms round-trip latency of the trans-pacific internet traffic. Or, you will not be able to defend against a Tbps scale DDoS attack without taking down your website or breaking the bank.
This is where the a globally distributed edge like Cloudflare comes to handy. This is how it works. And did I mention, Cloudflare has a free tier?
Prerequisite
- A working origin website
- A domain name that you control
- A free Cloudflare account
Notes
- This Cloudflare thing sounds complicated, but to your surprise, it is not at all. With the prerequisites ready, you can enroll your website onto Cloudflare within 5 minutes in a web browser. The rest is just
- And Cloudflare’s standard features already include many production-ready performance optimization techniques and security best practices. That is the reason why you can forego the web performance and security optimization in the last step.
Guides and References
Final Words
The fact that you are reading this post means that this system is working!
Since this is the longest post I have ever written on this blog, there are many ways it can be improved. I would love to hear your comments below.
I hope this post gives you some idea about this side project of mine. Thanks for reading!
/Chris